Your First Mod
You will learn:
- How to use the Unity Explorer Object Browser
- How to use the Unity Explorer Inspector Window to inspect an object
- How to use the Unity Explorer Hooks menu to design a hook
- How to recreate that hook in a plugin loaded by BepInEx
Table of Contents
Install Prerequisites
This guide assumes you’ve already installed BepInEx following the instructions from their repository. You specifically want the latest version 5 LTS
Plugin Template for Obenseuer
If you’ve already done this step then go ahead and skip to the next one, great job!
You can find the template and install instructions here
Unity Explorer for BepinEx 5
You can get the most maintained branch of Unity Explorer from Yukieiji as the original author, Sinai-Dev archived the original project several years ago.
Unity Explorer is possibly the most important tool in a Unity game modder’s arsenal. Before continuing from this step, I suggest you simply click around in-game and explore the hierarchy browser, object inspector, free cam and C# REPL Console features of UE.
Setup Your First Plugin
Instance the Template
Following the instructions from the Template repo, create a new folder where your project will live and make sure it has a nice name, this will be the name of your plugin. From inside this folder run dotnet new OSBepinPlugin and your plugin will be initialized to a base state.
Setup the Config File
If you’ve used the template before you can safely copy your Config.build.user.props file from one folder to the other. It will generally be the same between projects.
If this is your first time using the template copy the Config.Build.user.props.template file and rename the copy to remove everything after the .props part. It should look like Config.Build.user.props exactly, proper case matters here!
This file is simply an xml document with a goofy name so you can open it with any text editor, but I’d suggest your IDE of choice, for example, visual studio, VSCode or Rider. There will be a line defining the GameDir property with the text full/path/to/game, replace this with the actual full path to your game. You can find this by right-clicking your game in steam and selecting manage -> browse local files. This is required for automatically finding the game’s DLL files to depend on when modding so you can’t skip this step
Now go ahead and do a test build of your project. If you are using VSCode the default action will be a build and deploy action so you will see console output that contains Deploy -> somewhere near the bottom. If you are using VS I have included a task that should do the same but if it doesn’t you simply use dotnet build -p:DeployToProd=true to get the same build and deploy features.
If you do not see the console output for
Deploy ->in your build step, check the plugin directory for your game anyway and see if its working silently. Newer versions of MSBuild seem to consume the output of tasks without displaying it to the user so it may be running silently.
The plugin is now set up and your game has Unity Explorer. Let’s find something to patch!
Using Unity Explorer to Design a Mod
For this example we’ll just stick to something simple. Why don’t we react to when the player breaks a lockpick? Why? Because its really simple to do and demonstrates the process, hehe.
Consider doing all your experimentation on a clean save with a fresh startup of the game. Any tinkering you did before might still exist in the hierarchy (if you chose to spend some time with UE, like I suggested earlier). For testing, I have a save with a specific name so I don’t forget its just for testing and cheating.
Finding Our Hook Entrypoint
Since we want to interact with the player, let’s open the Object Explorer and search the scene for “Player”, I already know which object it is but try to figure out what GameObject in the hierarchy is the actual player object and not a map marker or UI panel container.
If you found it, great job! If you gave up, its the object called “[2] Player” this indicates it has 2 child objects, in this case Player Camera Base and ECM Player. Select the Player object and in its Inspector Window select the ECM Player object because it contains most of the physical presence of the player like various movement controllers and other components.
Hey, what’s that
DeveloperMovementcomponent? What happens if you open it in the inspector and scroll down to the methodActivateDebugMovement()When you’re done fooling aroundDeactivateDebugMovement()and continue to the next step.
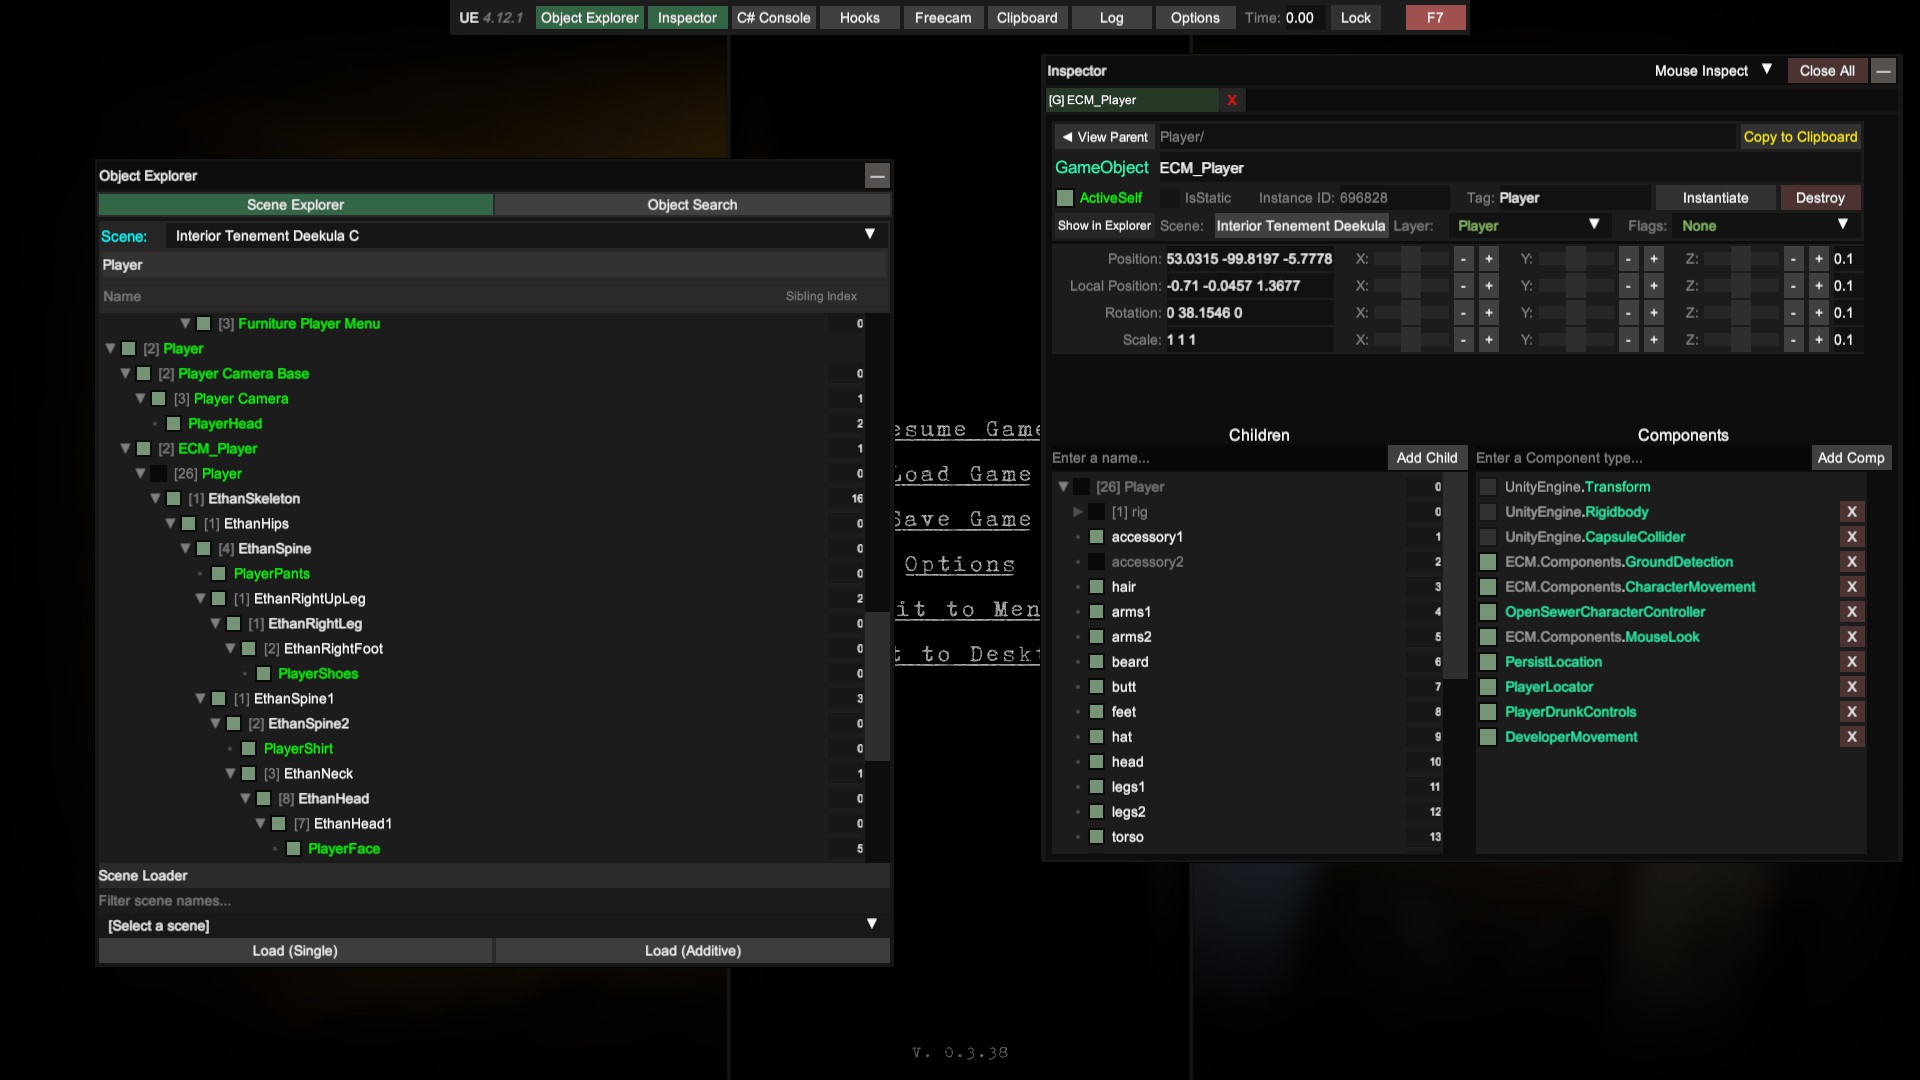
The ECM Player object contains a child object named Player (yes we’re going in circles, here) and that has a component named CharacterScripts. This component has a whole lot of goodies to play with but we’re interested in the component PlayerLockpicking which handles all the of the lockpicking interactions. Open this component in the inspector and see if you can figure out what method we’re about to target. If you’re having trouble finding just methods use the tick-boxes at the top of the inspector to toggle off properties and fields.
Notice the method named BreakLockpick. Let’s check when it fires by making a hook in the game without needing to load a plugin. At the top of the screen click the Hooks button to open the Hooks menu.
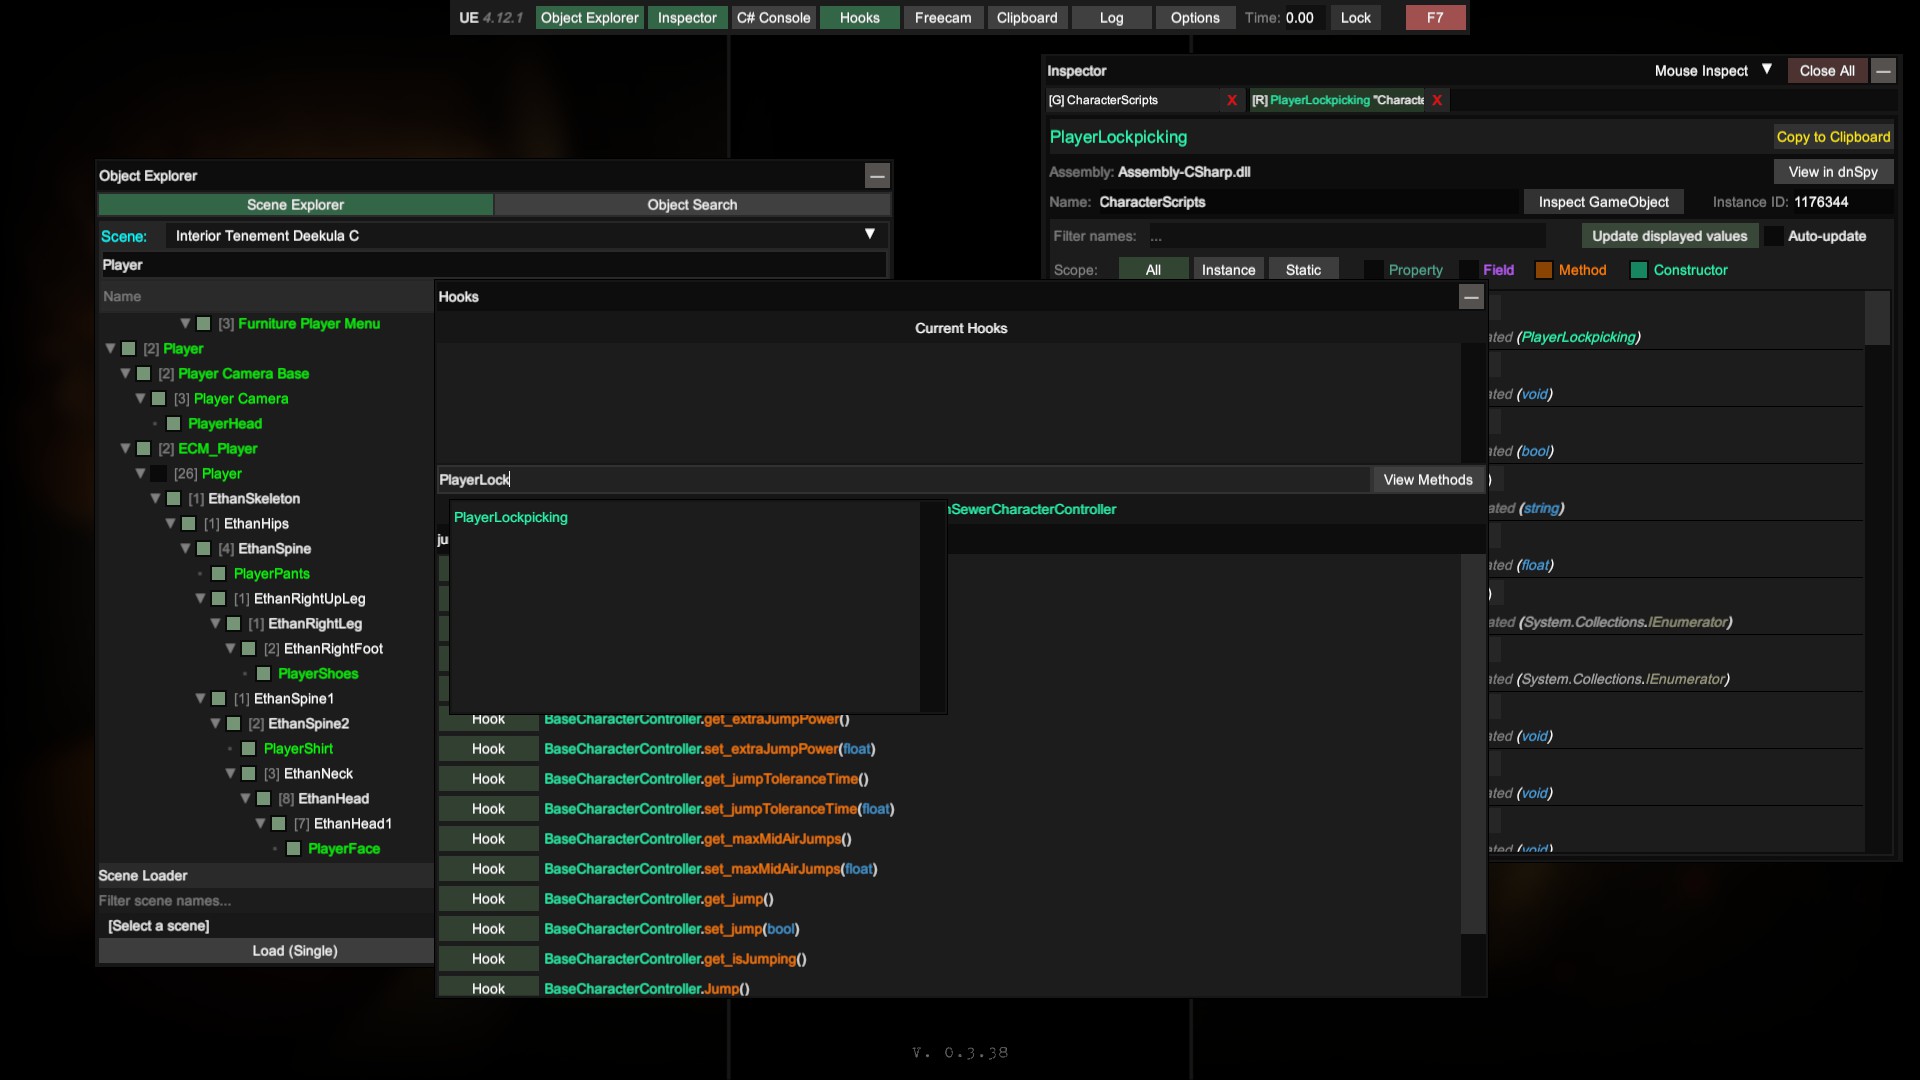
Use the field labelled Enter a class to add hooks to to filter to “PlayerLockpicking” and then click “view methods”. Filter to BreakLockpick and click the Hook button to generate a default postfix (runs after) hook for the method.
Feel free to click the edit button on your new hook but don’t change anything yet. Right now the default hook is just a log output every time the method is fired, which suits us just fine.
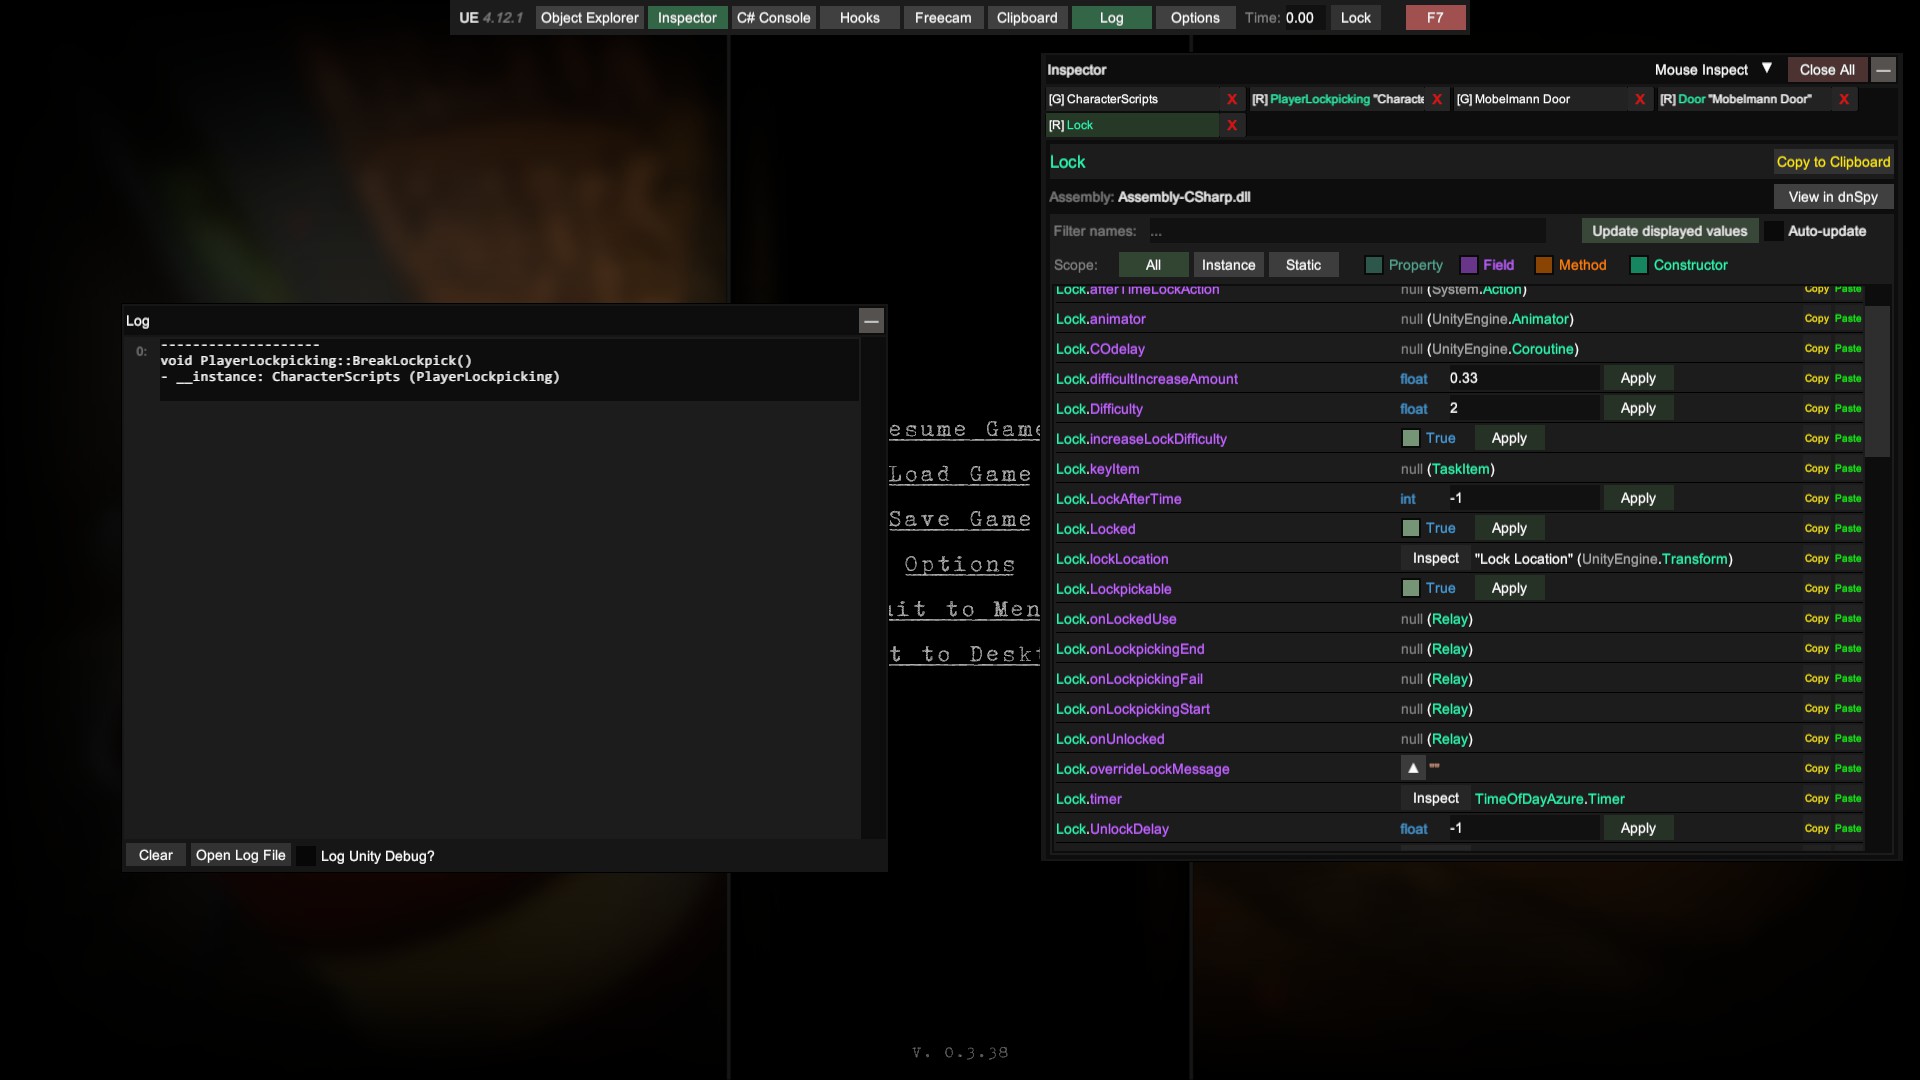
Find something you can lockpick and break your pick. You should be able to see the log output if you click the button labelled Log on the UE top bar menu.
Normally we’d want to do more than log, but for the purpose of an example we’re satisfied with this hook. So now let’s recreate it, but in a plugin!
Hooks do not survive closing the game and must be manually re-entered each time you do so. If you are working on code in a hook, keep a code editor open outside the game to hold a copy so you don’t lose it in the event you crash the game (you will)
Recreating the Hook in a Plugin
For this example, I’ve created a plugin named LockPickingLoser and added the hook we made above as a patch using Harmony. The template has extensive documentation on how to use Harmony for basic patches and why and how certain things are done the way they are. Please read through it and try to create the patch yourself. If you get stuck or lost, I’ll include the full text of both the Patch and the Plugin class to help or just to compare to.
Plugin.cs
using BepInEx;
using BepInEx.Logging;
using HarmonyLib;
using LockpickingLoser.Patches;

namespace LockpickingLoser;

[BepInPlugin(LCMPluginInfo.PLUGIN_GUID, LCMPluginInfo.PLUGIN_NAME, LCMPluginInfo.PLUGIN_VERSION)]
public class Plugin : BaseUnityPlugin
{
  internal static ManualLogSource Log = null!;

  private void Awake()
  {
    /*
      BepinEx makes you a ManualLogSource for free called "Logger"
      and I created a static value above to hold on to it so other
      parts of your plugin's code can find it by using Plugin.Log

      We assign it here
    */
    Log = Logger;

    // Log our awake here so we can see it in LogOutput.txt file
    Log.LogInfo($"Plugin {LCMPluginInfo.PLUGIN_NAME} version {LCMPluginInfo.PLUGIN_VERSION} is loaded!");

    Harmony myHarmony = new(LCMPluginInfo.PLUGIN_GUID);

    myHarmony.PatchAll(typeof(PlayerLockpickingPatches));
  }

}
PlayerLockpicking.cs
using System.Text;
using HarmonyLib;

namespace LockpickingLoser.Patches;
public class PlayerLockpickingPatches
{
    [HarmonyPatch(typeof(PlayerLockpicking), nameof(PlayerLockpicking.BreakLockpick))]
    [HarmonyPostfix]
    public static void PlayerLockpicking_BreakLockpick_Postfix(PlayerLockpicking __instance)
    {
        try
        {
            StringBuilder sb = new StringBuilder();
            sb.AppendLine("--------------------");
            sb.AppendLine("void PlayerLockpicking::BreakLockpick()");
            sb.Append("- __instance: ").AppendLine(__instance.ToString());
            Plugin.Log.LogMessage(sb.ToString());
        }
        catch (System.Exception ex)
        {
            Plugin.Log.LogWarning($"Exception in patch of void PlayerLockpicking::BreakLockpick():\n{ex}");
        }
    }
}
You should see the following in your LogOutput.log file:
[Message:LockpickingLoser] --------------------
void PlayerLockpicking::BreakLockpick()
- __instance: CharacterScripts (PlayerLockpicking)
That’s it for the basic overview of making a hook and creating a patch. For more advanced information follow the links to the Harmony docs regarding injectors in the template’s patch example.